How to Make DIY Watercolor Painted Bookmarks
![]() Cordelia Cross
Aug 30, 2025 12:11
0
Cordelia Cross
Aug 30, 2025 12:11
0
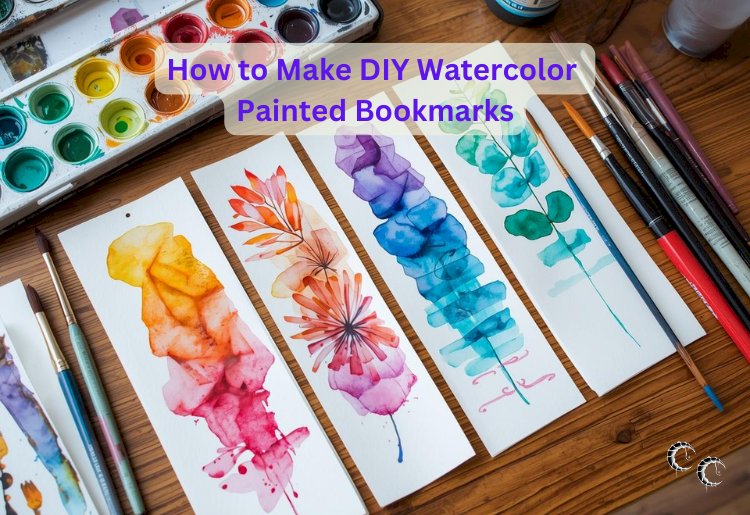
Watercolor painted bookmarks are a fun and creative way to combine art with practicality. They make wonderful personalized gifts and are an enjoyable craft project for both beginners and experienced artists. Here’s a simple guide to creating your own DIY watercolor bookmarks.
Materials You Will Need
-
Watercolor paints and brushes
-
Watercolor paper or thick cardstock
-
Pencil and eraser
-
Scissors or a paper cutter
-
Ruler
-
Water container
-
Paper towels
-
Optional: pens or markers for detailing, string or ribbon for finishing
Step 1: Prepare Your Paper
Cut your watercolor paper into bookmark-sized strips. A common size is about 2 inches wide by 6 inches long, but you can adjust based on your preference. Use a ruler and pencil to mark your cuts for neat, even edges.
Step 2: Sketch Your Design
Lightly sketch a simple design with a pencil. This could be abstract patterns, flowers, landscapes, inspirational quotes, or geometric shapes. Keep the design light so it won’t show through the watercolor paint.
Step 3: Apply Watercolor Paint
Wet your brush and apply watercolor paint to your bookmark. Experiment with gradients, washes, or blending colors. You can use techniques like wet-on-wet for softer blends or wet-on-dry for sharper details. Let the colors flow naturally and embrace the organic, fluid quality of watercolor.
Step 4: Add Details
Once the base layer dries, you can add fine details using a smaller brush, watercolor pens, or even ink pens. This could include outlines, patterns, or lettering to personalize your bookmark.
Step 5: Let It Dry
Allow your bookmark to dry completely to avoid smudging. You can press it under a heavy book to keep it flat if the paper has warped slightly from the paint.
Step 6: Optional Finishing Touches
Punch a hole at the top and add a ribbon or string for a decorative touch. You can also laminate the bookmark for durability and to make it last longer.
Tips for Beautiful Watercolor Bookmarks
-
Use high-quality watercolor paper to prevent warping and allow vibrant colors.
-
Experiment with color blending and layering for unique effects.
-
Keep designs simple if you’re new to watercolor. Overly complex designs can be tricky on small bookmarks.
-
Practice on scrap paper before painting your final bookmarks.
Conclusion
DIY watercolor bookmarks are a delightful way to combine creativity and functionality. They can be personalized for friends, family, or yourself, making reading a more colorful and enjoyable experience. With a few materials and a bit of imagination, anyone can craft beautiful, one-of-a-kind bookmarks.